
Part 1 – Introduction
Part 2 – Woodworks
Part 3 – Control Panel
Part 4 – CRT Assembly
TBD: Part 5 – Electric Assembly
TBD: Part 6 – Software Setup
Multiplex/Blockboard
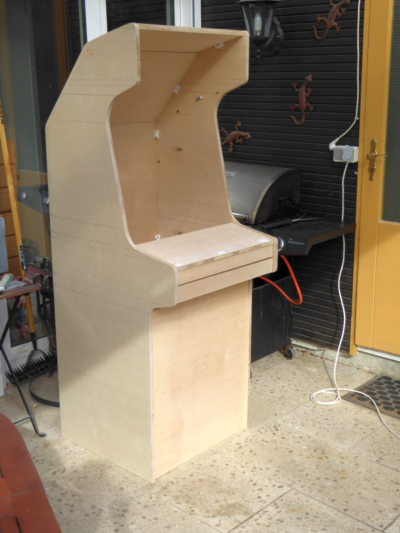
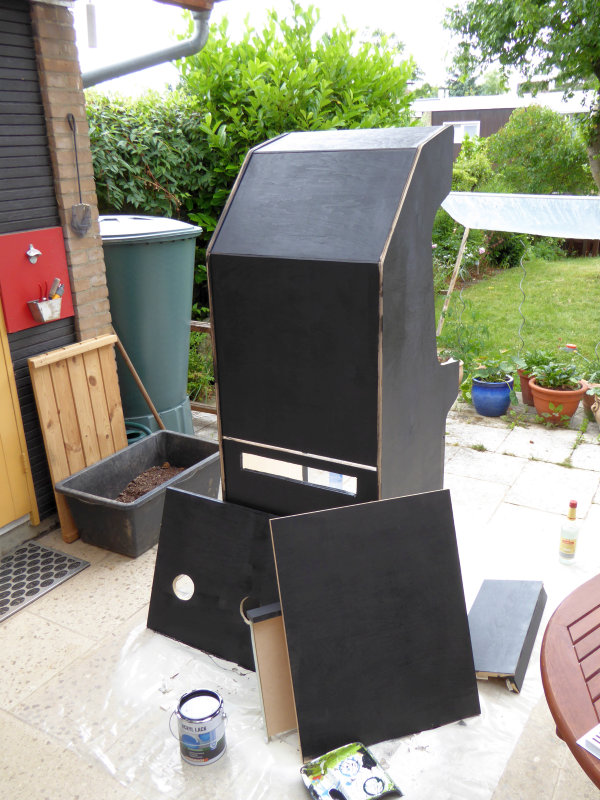
I did a lot of thinking about which type of wood to use – I don’t like MDF, it should be stable, not too expensive and not too heavy. Due to the task of cutting the groove for the t-molding – which I never did before, less operating a router, I requested a quote from a local carpenter which made me sit down and rethink the whole idea. Finally I ended up with 18mm beech multiplex for the sides and 18mm birch blockboard for the connecting boards. Those are quite stable, warp-free and cost approx. 25€/m2 in Germany, leaving me with costs of around 150€ for the wood.
I already own a jigsaw and a band sander, so all I needed was a router or a tool to cut that molding groove. Fortunately I decided on the router which in general gave my edges a seriously better quality than the jigsaw. Since the cheapest routers in the tool-shop are around 130€ and I have very few uses for such a tool, I decided to take my time and bought a brand new router for 15€ from the flea market – complete with a set of cutters.
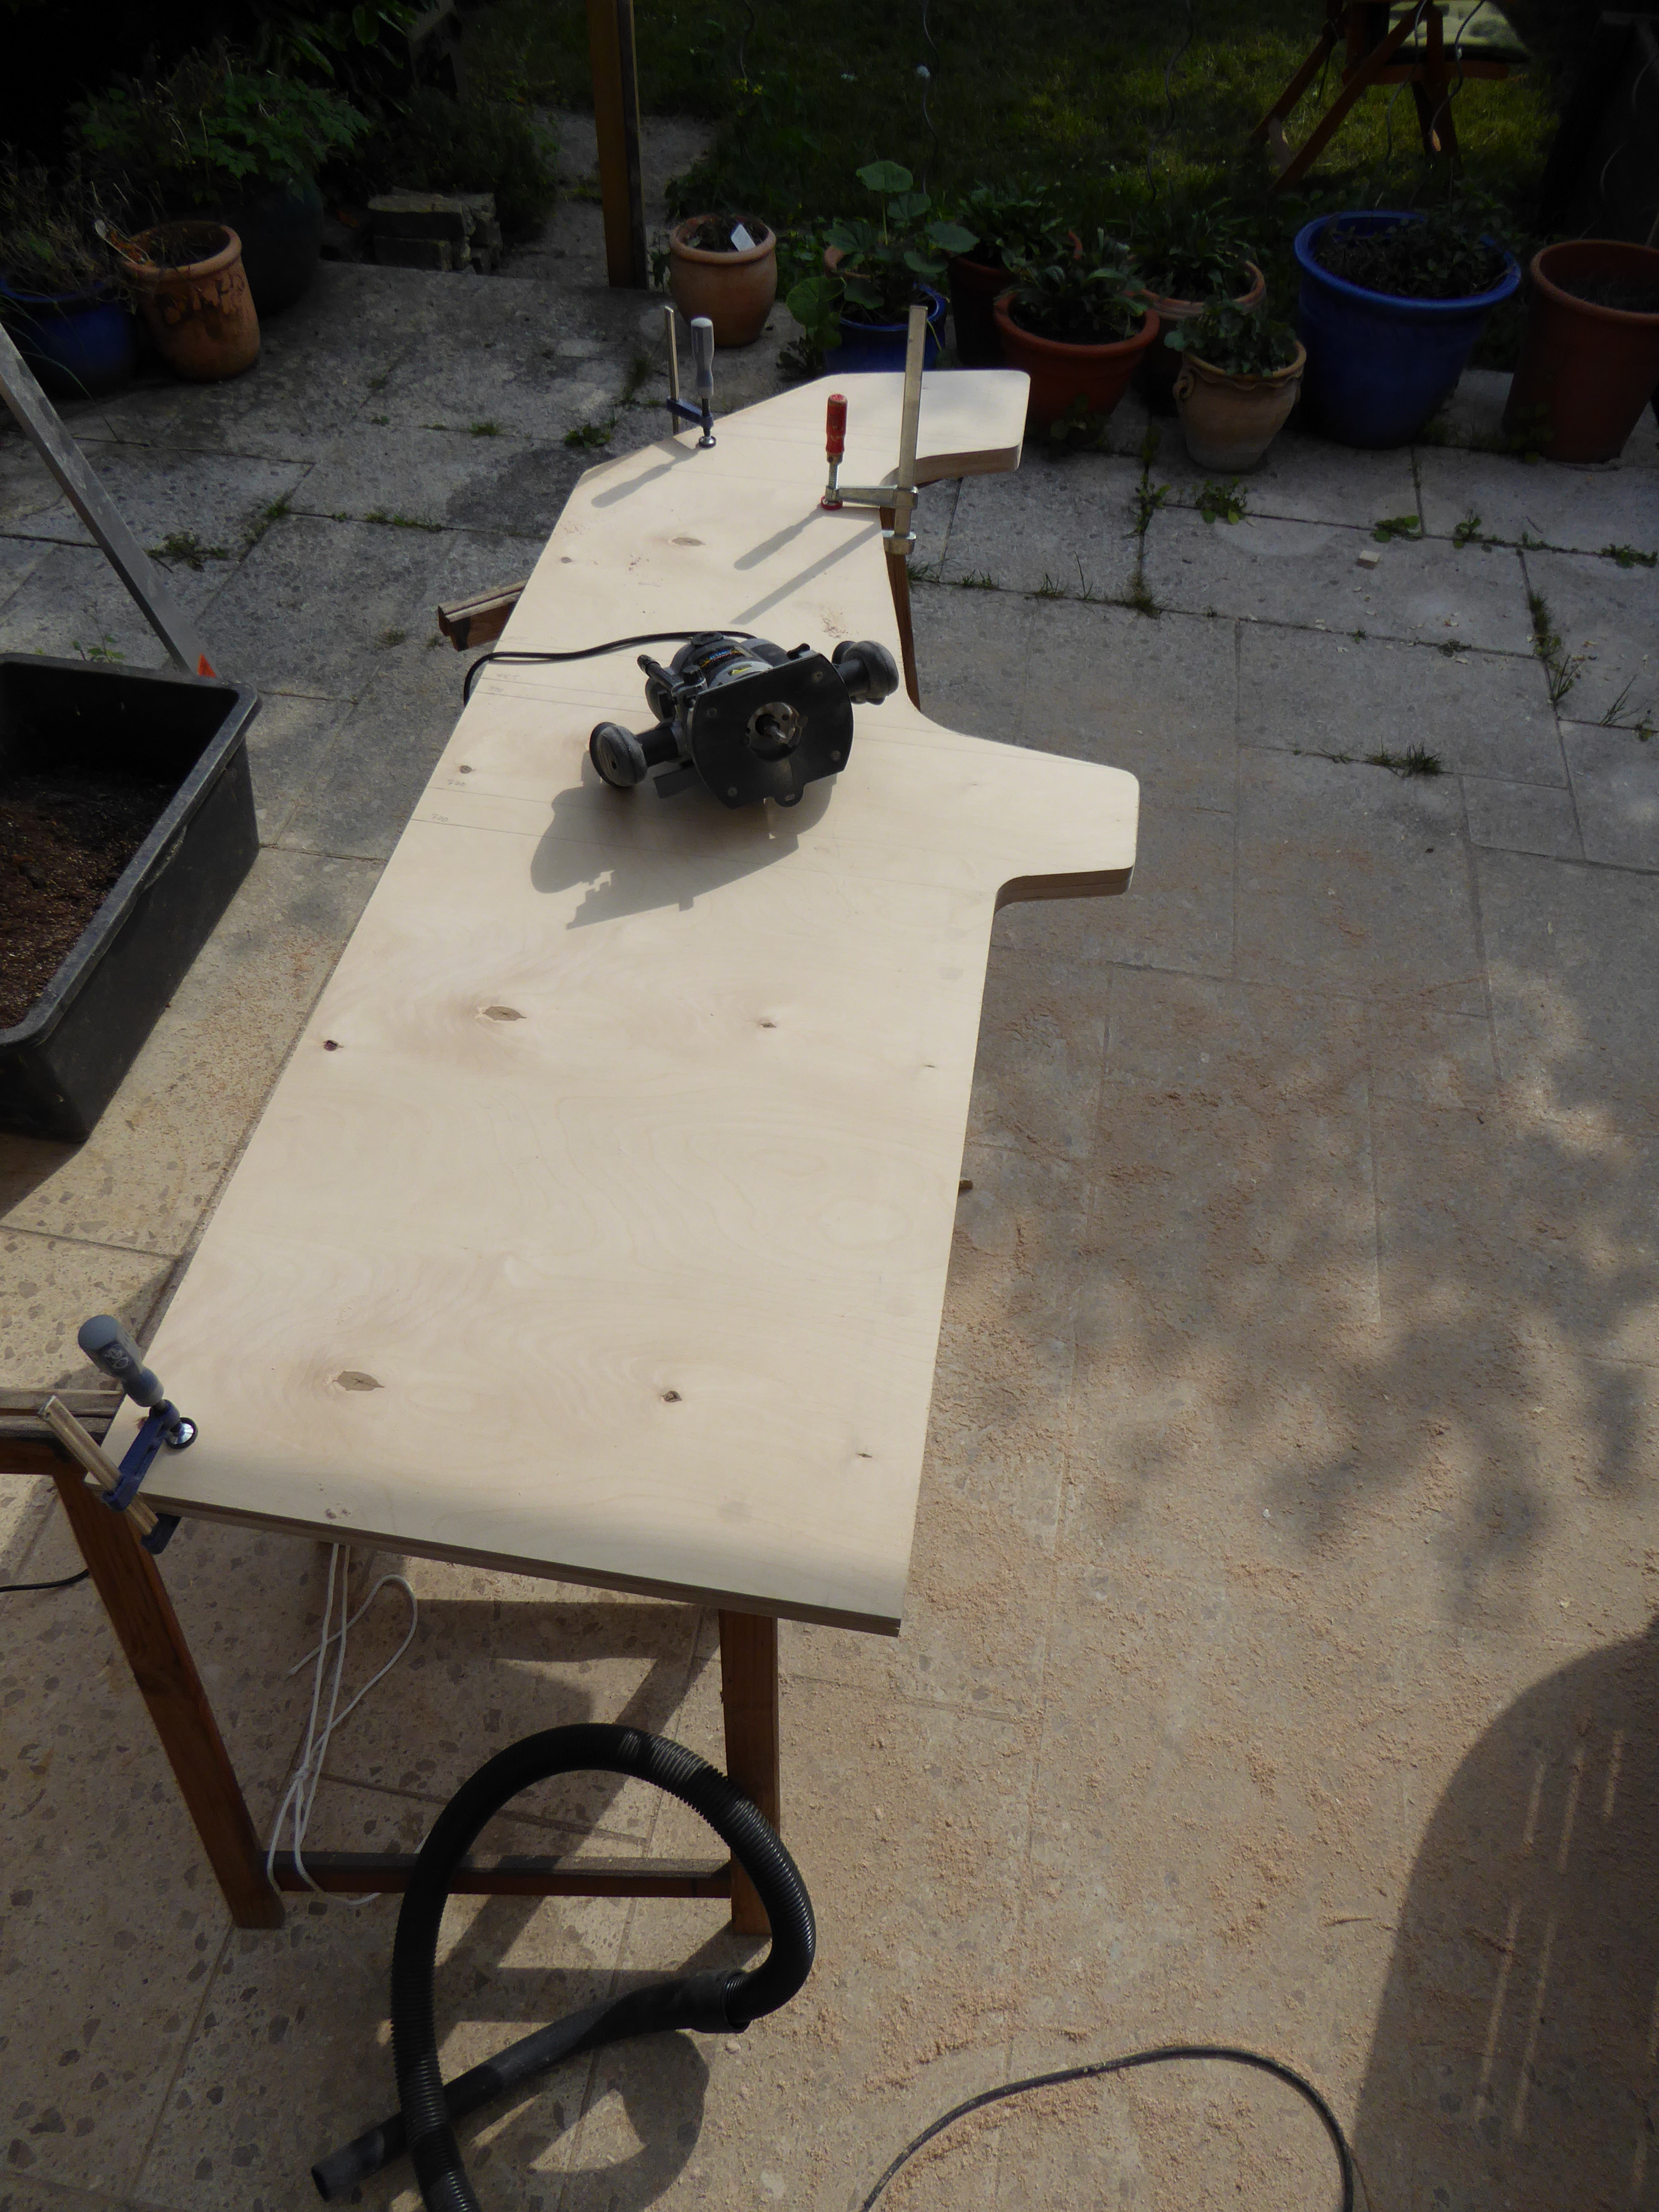
I transferred my shape to one side first, cutting it with the jigsaw, straightening the edges with the router and a clamped straightedge (normally used for concrete) and finally rounding the corners very carefully with the band sander to keep the edges as angular as possible. Then I cut the second side very roughly, leaving some mm space to the shape, clamped the second board on top of the first and used a copy-router (google it 😉 ) to make the two sides absolutely identical. Since I planned to put the connecting boards some millimeters “in” anyway, like they have been in the old cabinets, I didn’t have to be too precise in terms of measure, but identical was an issue.
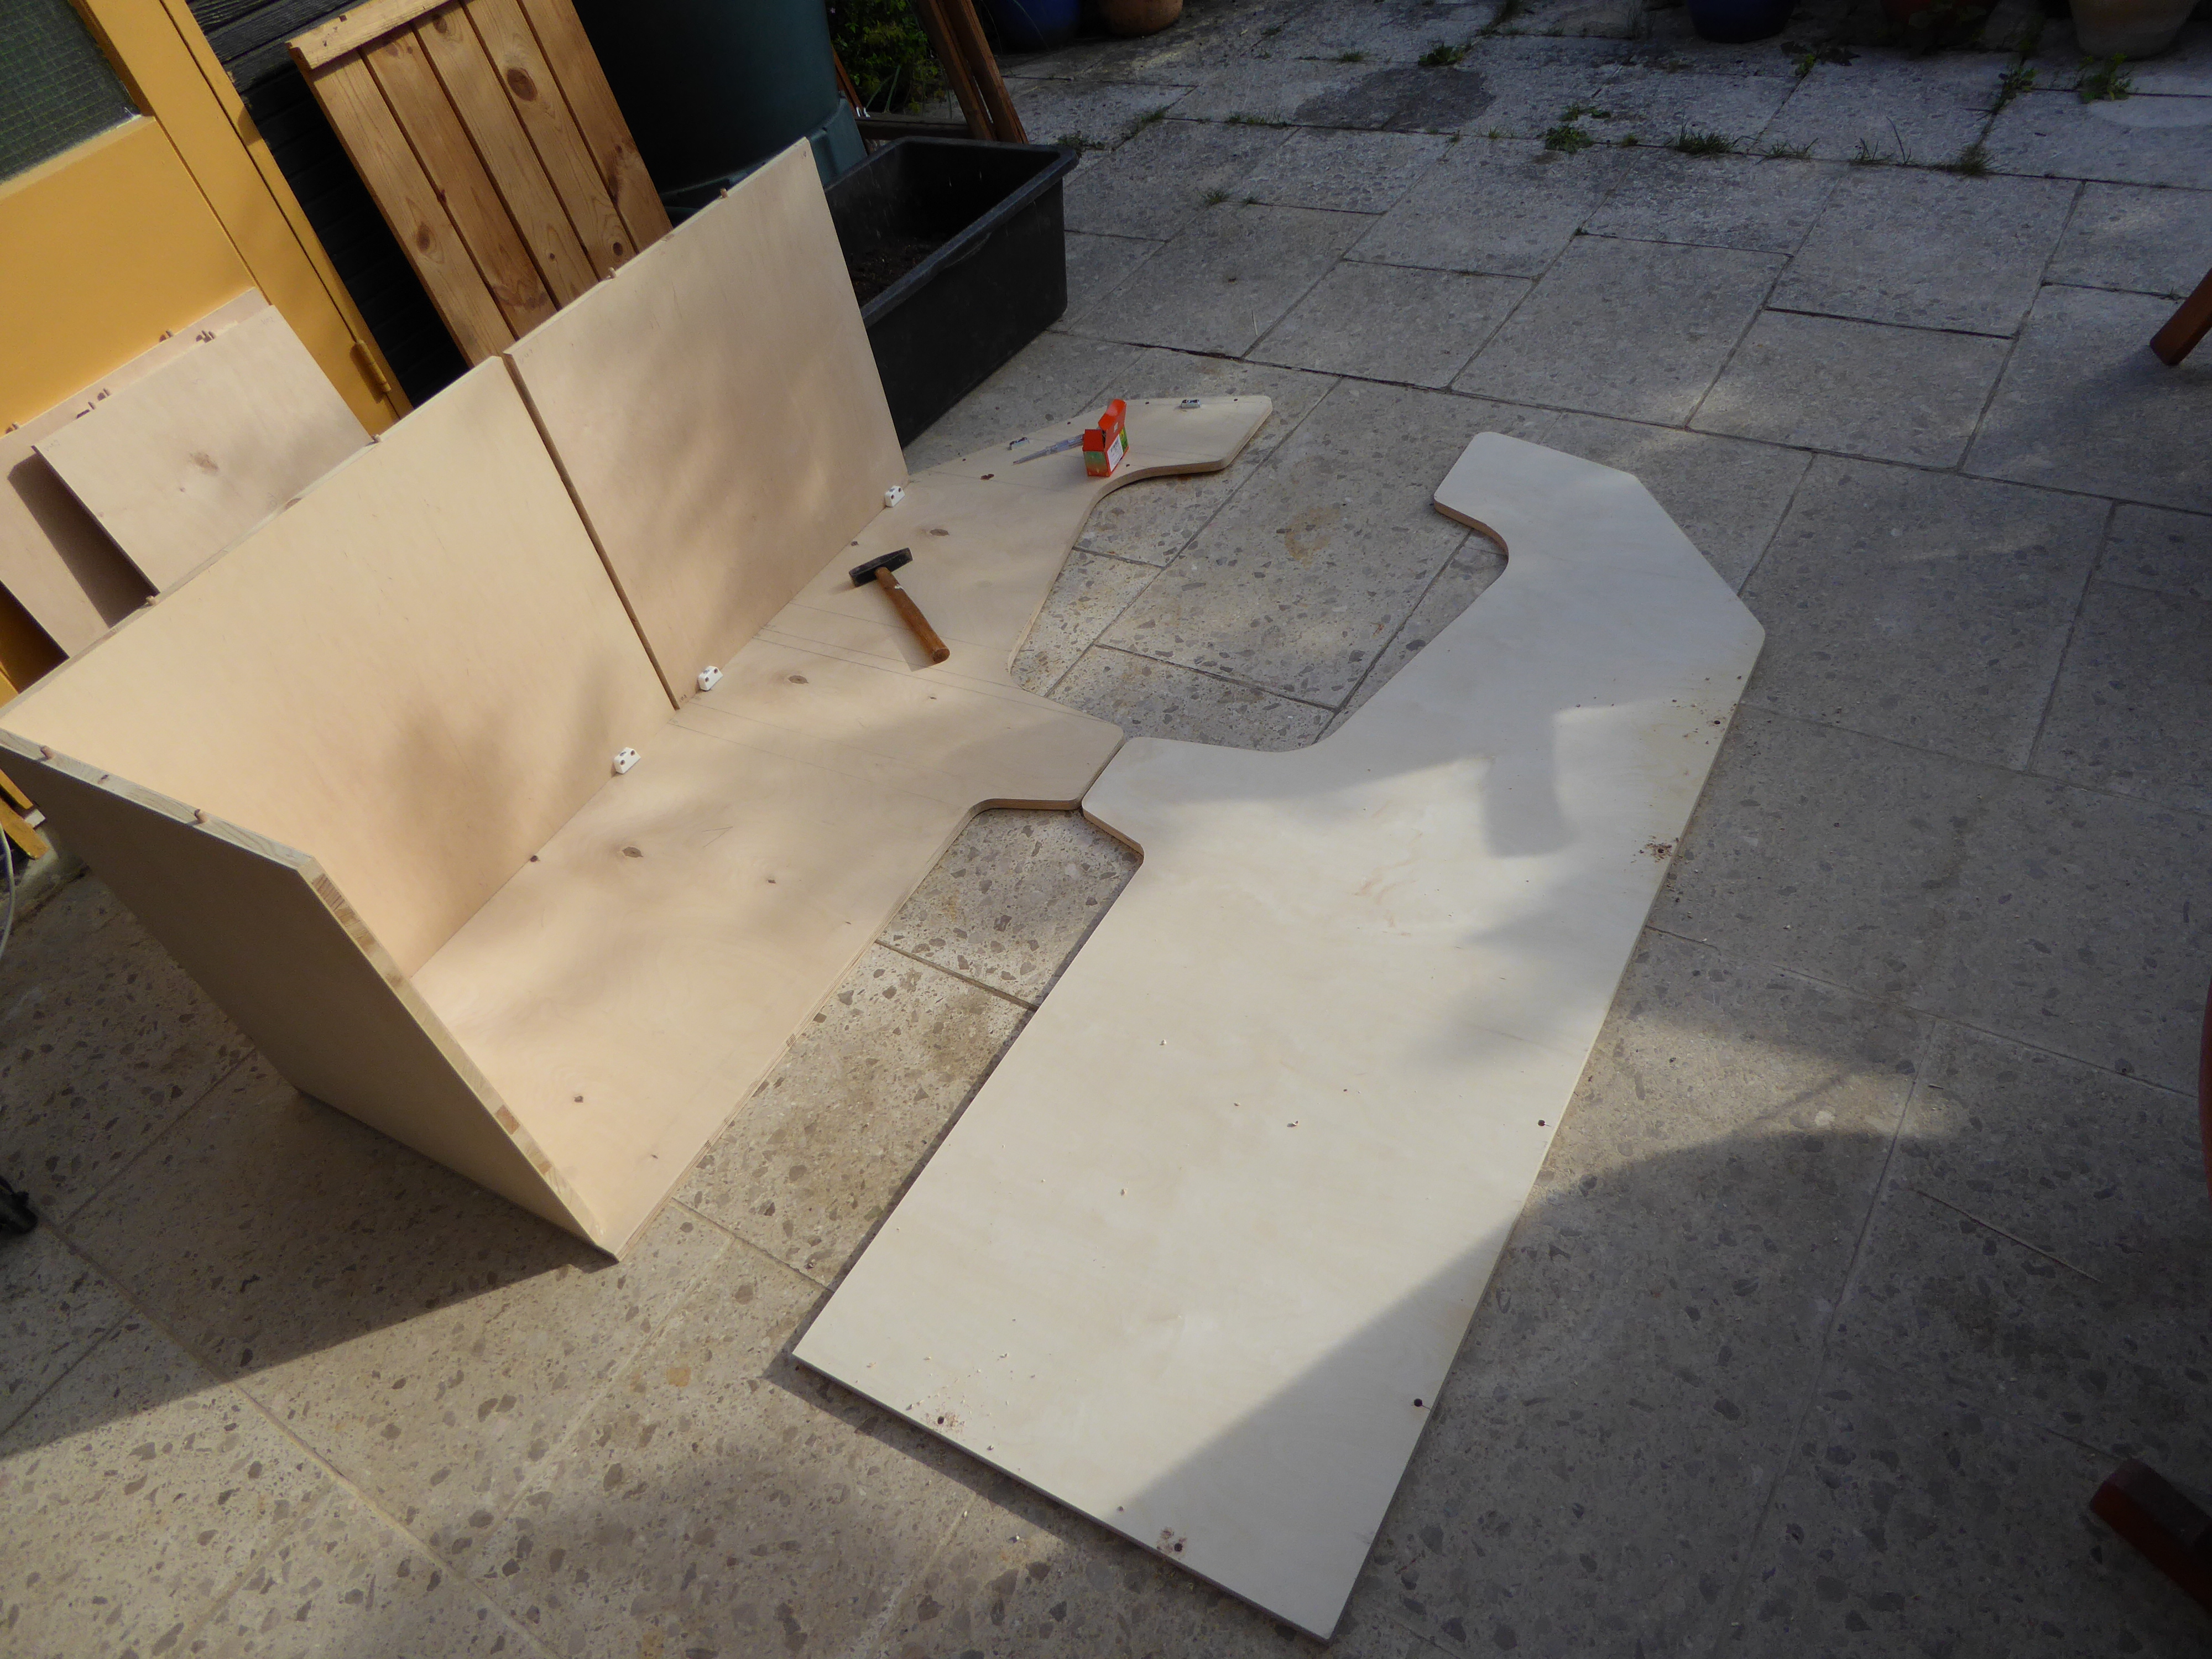
Since I still had a lot of respect concerning the groove-cutting (and my t-molding had not arrived yet) I built the form of the cabinet first, using wooden dowels (take an aligning tool for this!!!) and furniture connectors – thus, I can disassemble the cabinet later, if I want to move it.
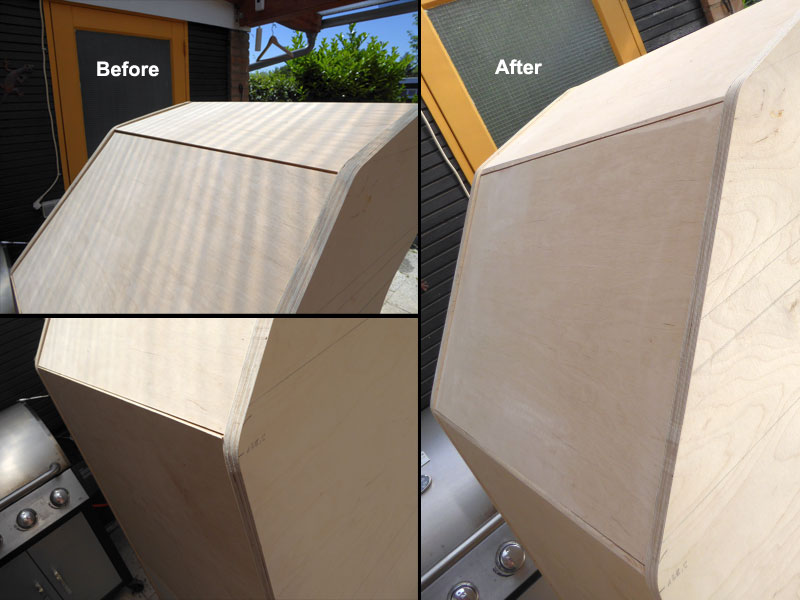
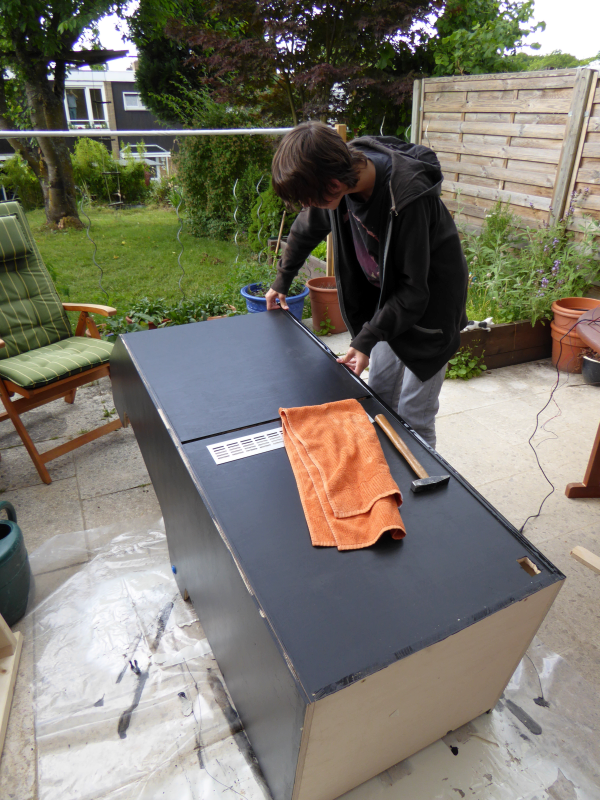
It’s vital to cut the groove before sanding and painting the cabinet, otherwise the router may leave traces. Cutting the groove was a piece of cake – contrary to my expectations. I used a template guide to prevent the cutter of biting in too deep, one of my biggest concerns but it worked like a charm.
Sanding
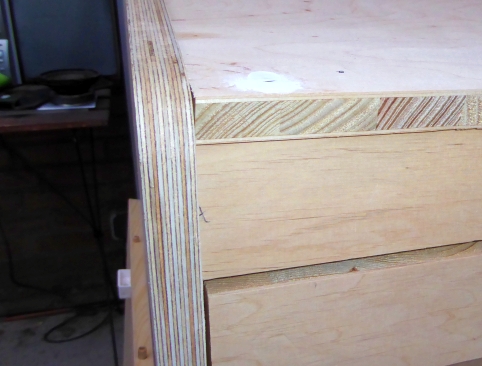
In my case, sanding was a rather simple issue, since multiplex and blockboard are pretty smooth already. I just had to smooth out the topmost edges, where the connecting boards came together at an angle (see pics). Then I painted with acrylic black matte, three times. I love acrylic here, because due to the water-based paint you don’t have to worry about tool-cleaning and drying times. Just use your sink.
Of course, there’s much room for failure … some of my dowels didn’t fit, so I had to leave them or to cut bigger holes or shorten them. In two cases I drilled through, so I had to use wood putty to conceal my sloppy work. Some of the furniture connectors refused to fit, so they had to be coaxed by brute force(hammer) to cooperate.
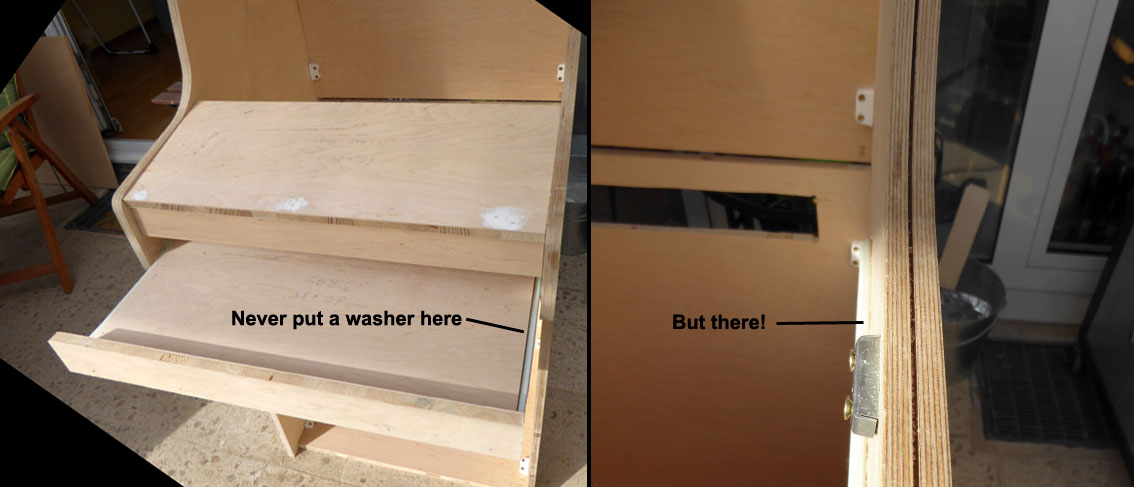
Washers
I did a major failure on the tray which was a bit too narrow for the guiding rails, so it kept constantly falling out. In a state of foolishness I tried to widen the tray by putting washers between the edge of the tray and the rail, which led to an even more frail construct. Later I put the washers between the sides and the side rails – a much more solid solution.
But all in all, I was quite amazed that even for somebody like me who does things like that only one or two times a year a certain amount of precision is possible.
-
- Assembly

-
- Painting
-

- T-molding
[…] Part 2 – Woodworks […]