
Part 1 – Introduction
Part 2 – Woodworks
Part 3 – Control Panel
Part 4 – CRT Assembly
TBD: Part 5 – Electric Assembly
TBD: Part 6 – Software Setup
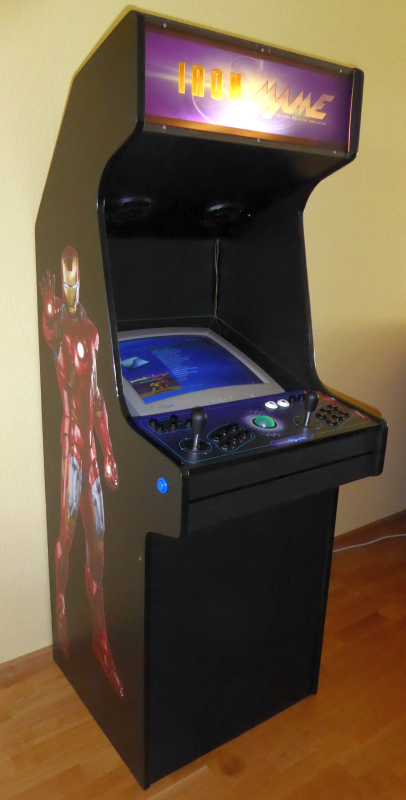
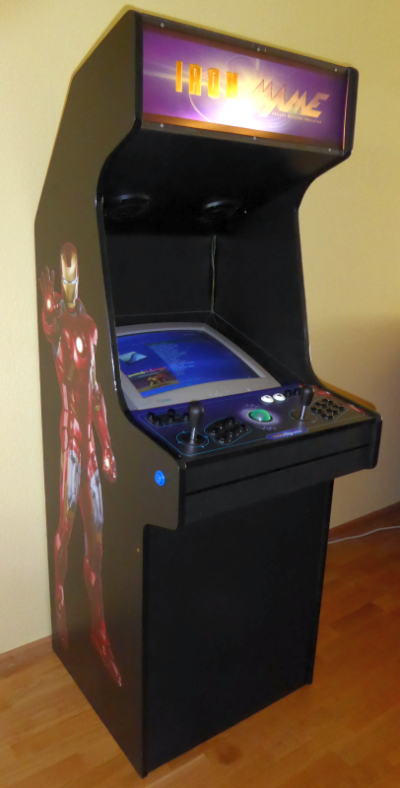
IronMAME
So there I was, browsing the internet on my favourite console pages and suddenly realized, that obviously a lot of people are building 80s style cabinets with real heavy-duty arcade controls and filled with emulators to the brim. “Cool”, I thought … I’m a child of the 80s, I’m the do-it-yourself-type and I needed a holiday project for my two sons (14 and 16) anyway. First question was “buy or make?” and since all decent original cabinets for sale that I found ranged around 1000€ up to 2000€ not including shipping from somewhere around the world, I was more than inclined to give it a try myself.
The next questions were about the theme I wanted to give it and a lot of design thoughts about controls (Trackball? Spinner? Flipper buttons?). Since I wanted to do something individual, I quickly decided to do my “own” artwork. I had enough graphical knowledge to know that printing in these sizes would require extremely huge graphics or going vector, so I started to learn Inkscape, a free and very well documented vector drawing tool with a lot of tutorials available. I had the advantage of knowing Photoshop and I’ve been working with vectors in 3DS Max before, so I had an easy learning curve, but even for beginners, this should be no big issue. A very big help for button layouts have been the many choices at Slagcoin, an excellent knowledge resource for arcade cabinets anyway.
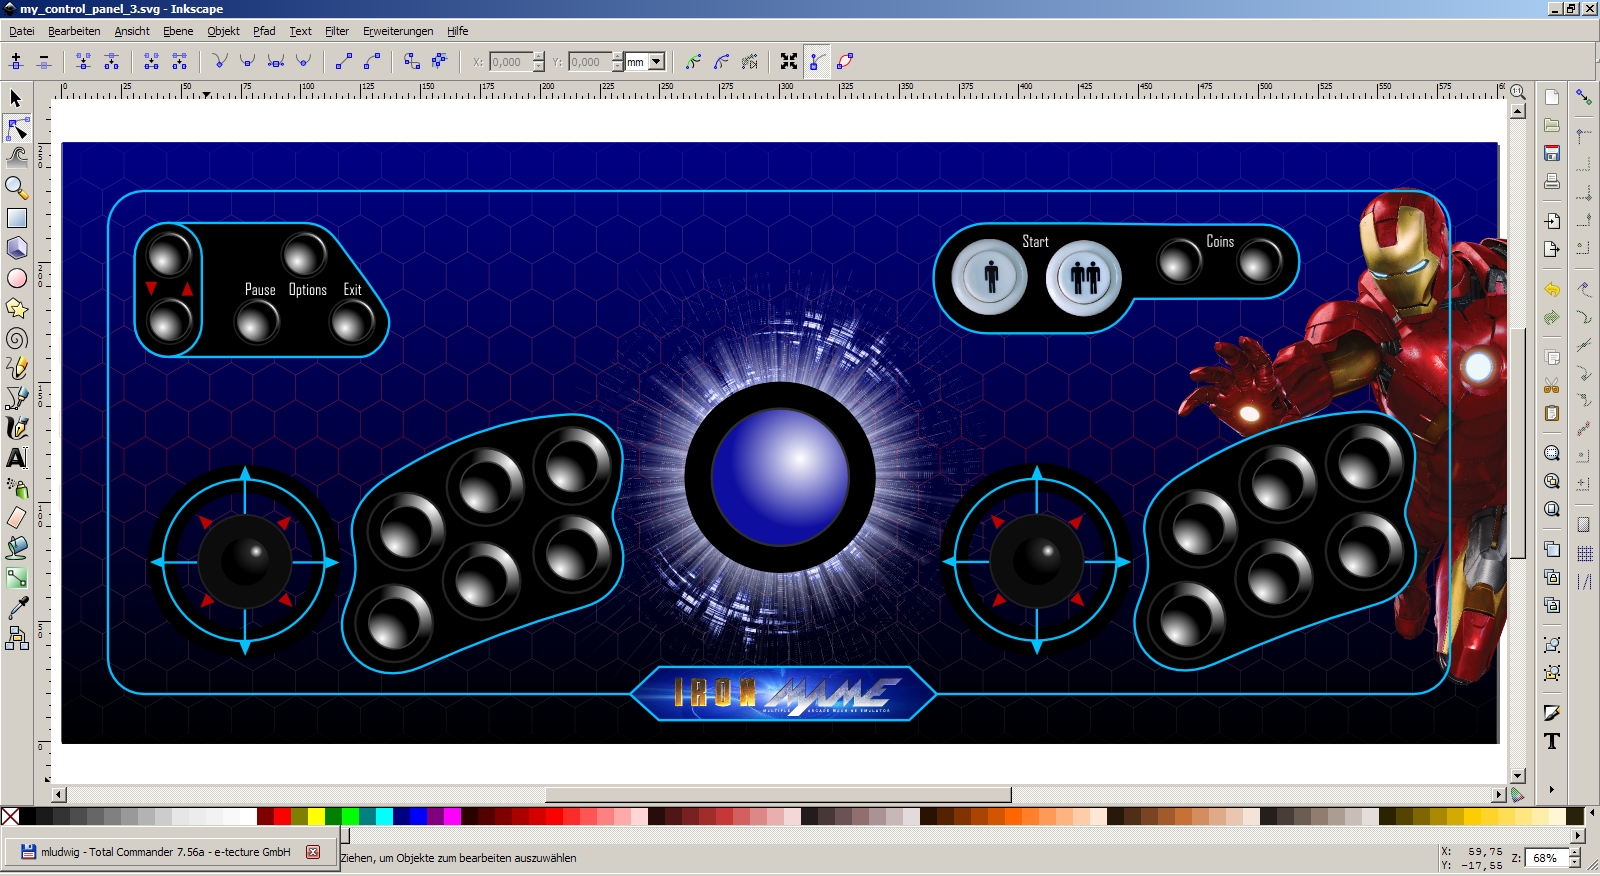
Control Panel
The decision for an Ironman theme was made due to the hi-res images available on the web and a little word play going from Ironman to IronMAME. To avoid copyright issues, my “derived work” is not available for download, but the tutorial for my control panel can be found here.
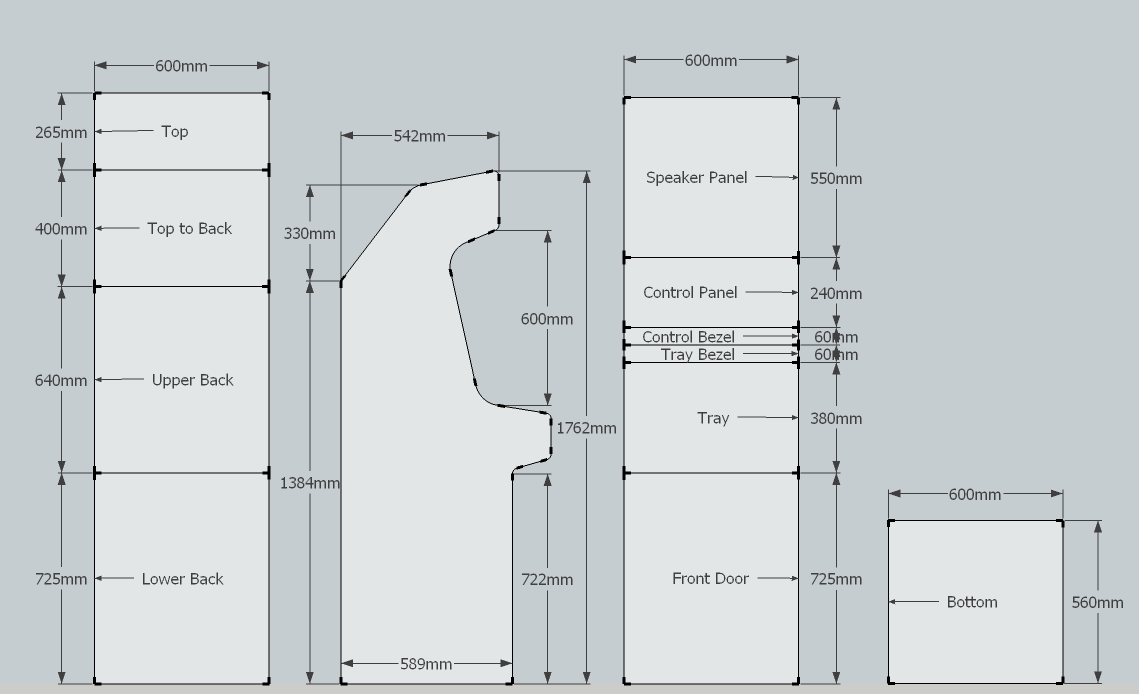
Now I had an idea, a layout for control panel and marquee but no clue as to the form of the cabinet. Fortunately Robotron2048 has a good compilation of all thinkable forms of cabinets to get inspiration and a point to start with. Nevertheless, I wanted the cabinet to match my size (1,87m) to fit a CRT and to have a tray for the keyboard, so I had no choice than to make my own plans matching the used Fujitsu 21” monitor I bought for just 20€. Not to mention the fun that 3D modeling gives to me …
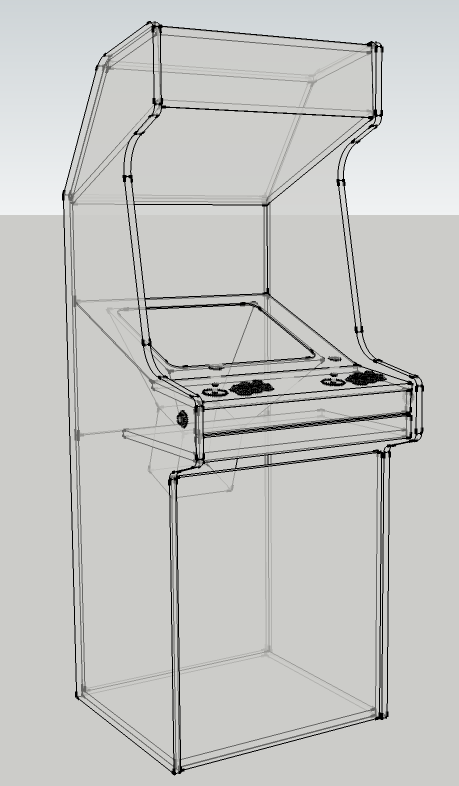
Sketchup Drawing
A good, free tool to do this is Sketchup 2015, which is a bit odd at first if you have modeled with other tools before since it works primarily with faces and extrusions instead of vertices and splines, but if you get the hang of it, it works out quite well. After a bunch of tweaks and adjustments I finally decided on a rather conservative design with rounded corners – mainly because I never have worked with t-molding before and had quite some respect of the mounting and corners.
Sketchup Plan
My final design can be downloaded here although I later found out, that there are already a lot of arcade models in the (free!) Sketchup Library. Furthermore, I did a flattened measured blueprint which helped me a lot during the cutting of the sides due to the integrated measuring tool in Sketchup.
Meanwhile I already ordered moderate priced arcade controls with a Xin-Mo Dual Controller via Ebay that connects to a PC via USB and a lighted Trackball that connects as a mouse but needs separate buttons. Since I’m an unexperienced leisure-player, I didn’t exactly care about lag issues, knowing, that little piece of electronics could be exchanged later anyway if the need arises.
BTW – buttons are an important topic that needs to be thought about much in the beginning. I did a lot of research and discussions on the Facebook MAME Group and for my part went for a curved 6-Button layout with two additional flipper buttons at the sides. Xin-Mo supports 12 buttons for the one and 10 for the other player, and I was told I will definitely want two coin and two player start buttons. That’s 9 buttons for each player, leaving 4 Buttons for Frontend/Emulator Controls like “Exit”, “Pause”, “Options” and so on. Furthermore you might like left and right mouse buttons that don’t take button slots on the controller if your trackball supports them, although some people tried to persuade me that they are totally useless.
My personal learnings so far:
- I have yet to find a game, that needs a second coin button
- I definitely want a mouse button, if not two, since it’s much easier to work with
- I’m (at this time) content with a Pause and and Exit button for Frontends
- So I might reconfigure some buttons later – bringing me to the point of not labeling buttons next time but rather give them symbols like on a Playstation controller
A first very rough setup with a quick-and dirty control panel prototype proved to be working and spending much fun, so we’re ready to start the woodworks …
Useful Links:
(1) Inkscape: https://inkscape.org/en/
(2) Slagcoin Button Layouts: http://www.slagcoin.com/joystick/layout.html
(3) Burningmind Control Panel Tutorial: http://www.burningmind.de/tutorial-arcade-control-panels-with-inkscape/
(4) Robotron Arcade Cabinet Shapes: http://www.robotron2084guidebook.com/technical/gameplatforms/arcade-cabinet-silhouettes-and-shapes/
(5) Facebook MAME Group: https://www.facebook.com/groups/194861703858251/
[…] Part 1 – Introduction Part 2 – Woodworks TBD: Part 3 – Control Panel Assembly TBD: Part 4 – Monitor Assembly TBD: Part 5 – Electric Assembly TBD: Part 6 – Software Setup […]
[…] Part 1 – Introduction Part 2 – Woodworks Part 3 – Control Panel TBD: Part 4 – Monitor Assembly TBD: Part 5 – Electric Assembly TBD: Part 6 – Software Setup […]