
Part 1 – Introduction
Part 2 – Woodworks
Part 3 – Control Panel
Part 4 – CRT Assembly
TBD: Part 5 – Electric Assembly
TBD: Part 6 – Software Setup

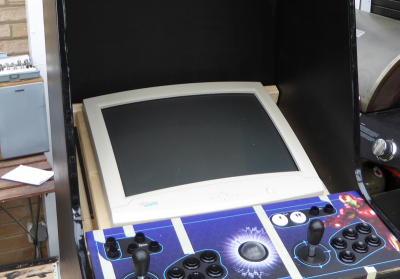
Mounted
There’s no better sound than a saturated “whoomp” from a solid 21” CRT being switched on, let alone enjoying scanlines without further equipment, so I didn’t even think about a LCD screen. These relics go cheap and so I was able to locate an old but good Fujitsu Siemens for just 20€. But alas, how does one mount such a monster? It’s about 55cm deep with the plastic housing, so first I stripped everything but the front bezel , partially, to have a mounting support, partially, because the control panel was more or less embedded in it.
Warning: Don’t do that, if you have no experience in doing such things. Cathode ray tubes are bulky, heavy, vacuumized and still fragile, especially at the back end, where the ray gun resides. Furthermore they generate quite a bunch of very high voltage, so if you don’t want to meet your creator too early – be *very* careful.
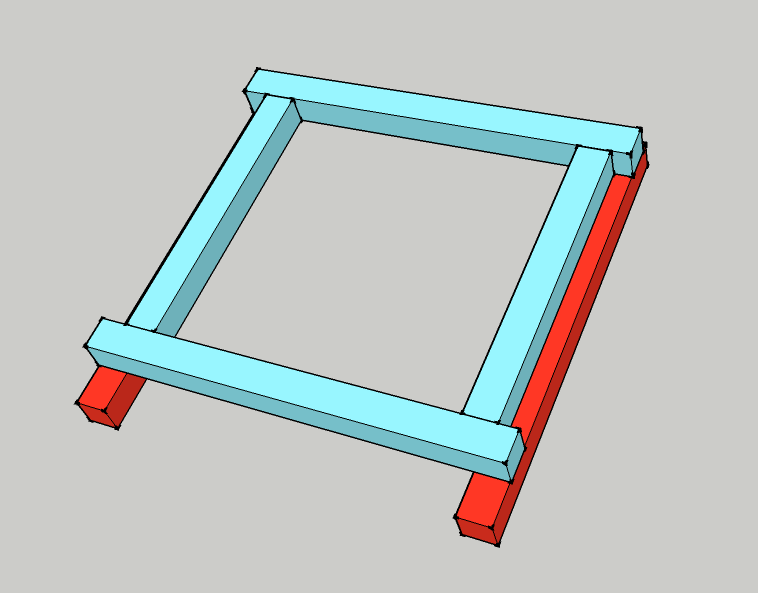
Sliding Frame
I had to mount it at a flat angle, because the depth would not permit a steeper one and I always liked to look down on the screen. Since measuring a thing with all-rounded corners, mounted at an angle is no easy feat, I decided on making a very tight frame from 3x4cm wooden beams with some centimeters of extensions on both sides that would rest on wooden “rails” from the same stuff, that I would glue/screw to the sides of the cabinet. So, I would be able to make adjustments of several centimeters forth or back, depending on my needs.
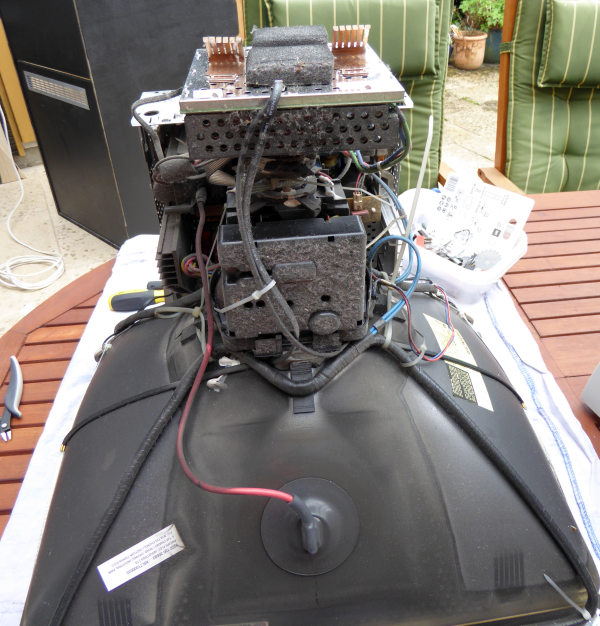
Stripped
The plastic bezel sat nicely on the edges but I was still afraid, that something could break, slip or otherwise go wrong, dumping my precious but bulky treasure with a solid crash inside my cabinet, mashing the PC to pulp and ruining my dreams. So I secured it with a kind of “cradle” made from metal bands with an isolation/softening of pieces of water-hose. Maybe the water hose alone would have been enough – but the stuff was there and you never know.
Fortunately, my plan worked, the frame slid nicely on the rails and I was able to fix it in the right position with some screws. Here we go – screen’s in!